


RV Roof Sealant Guide 2025 | Best Products, Application Tips & Mistakes to Avoid
Every RV owner knows this: RV roof leaks are no fun.
Not only do they make a mess, but if left unrepaired, they can lead to mold, mildew, rotten plywood, soft spots and water damage, which may require a complete roof replacement.
However, the good news is that not every leak requires a full-blown tear-down and rebuild. In fact, most minor leaks can be repaired by using a good sealant.
The problem is that there are many RV sealants on the market. And choosing the proper sealant for your RV's make and model, applying it correctly, and maintaining it can make all the difference between a repair that lasts a few weeks and one that lasts for the next few camping seasons.
Below, we'll walk you through the different types of RV sealants, including a few product comparisons and top picks, as well as some of the most common mistakes to avoid when repairing RV roofs.
What Is RV Roof Sealant (And Why It's Important)
RV roof sealants encompass a broad range of sealant products, including self-leveling lap sealants, RV sealant tape, silicone caulk, and RV roof coatings.
These products differ in terms of their composition and intended use. But they're all designed to help RVers keep their rig waterproof. Sealants are used to seal openings around roof seams and edges, vent caps, skylights, and air conditioner units, which are found on the roofs of most RVs.
We'll delve into the specifics of each of these product types below, but for now, here's the key difference between sealants and roof coatings.
- RV roof sealant - Refers to lap and cap sealants, caulk, or RV sealant tape, which are used to repair isolated gaps or cracks where water can get in.
- RV roof coating - Coatings are waterproof membranes that are applied to your entire roof. These are typically rolled on and are designed to provide full coverage protection.
Types of Sealants You Can Use on an RV Roof
Now, it's essential to understand that not all RV roofs are identical. Some RVs have metal roofs, while others have fiberglass roofs, and some have TPO, EPDM, vinyl, or rubber roofs. You may also find products labeled as camper roof sealants or trailer roof sealants, which can leave you wondering what type of sealant to use on your RV roof.
Let's examine the various types of RV roof sealants and their intended uses.
- Lap and cap sealants - Typically used for filling small gaps or cracks around vents, skylights, or seams. Lap sealant is intended for application between roof seams and flat surface, whereas cap sealants are non-sag, drip-proof products designed to fill gaps at roof edges.
- RV sealant tape - Best used for repairing longer gaps or cracks on flat surfaces. It can also be applied over top of lap sealant repairs to ensure they last as long as possible.
- Silicone caulk - Can sometimes be used to repair RV roofs. However, these products often fail to adhere to rubber and may not be suitable for outdoor use.
- Roof coatings - Are applied to the entire roof for added waterproofing and protection against UV damage, water, snow, and ice.
If you're looking to repair or maintain your RV roof, you're probably wondering: "How much RV roof sealant do I need?"
Well, my friend, that depends entirely on the type of product you're planning to use, the size of your RV, the linear feet of seams you're looking to patch, or the square footage of your roof if you're planning to apply a coat of roofing membrane.
So it's time to get up on your RV and start measuring!
Consider purchasing an RV roof repair kit, which includes all the necessary tools and products to complete the job correctly.

What Is Cap Sealant and When Should It Be Used?
Cap sealants are products designed specifically for repairing and protecting the edges (or caps) of your RV roof. These areas tend to flex a lot while your RV is in motion, and they get a lot of exposure to wind while you're on the road.
Cap sealants are generally non-sag sealants, meaning they won't drip or run when applied to vertical surfaces. However, just like lap sealants or RV tape, they're designed to provide waterproof protection to your RV's weak points.
What Is the Best Sealant for an RV Roof in 2025?
As you can see, the best sealant product for your repair depends on the type of exterior damage you're addressing.
Dicor, Camco, Liquid Rubber, Alpha Systems, Eternabond, and Tool Troopers are a handful of companies that sell RV roof sealant products and repair kits. These are all high-quality brands that offer a range of great repair products.
We also recommend checking out our TitanPatch RV sealant tape, which is designed to provide stronger adhesion, better durability, and longer-lasting waterproofing than similar products on the market.
That said, let's take another look at the different types of sealants side by side. You can also check out our comprehensive guide on how to apply RV roof coating the right way!
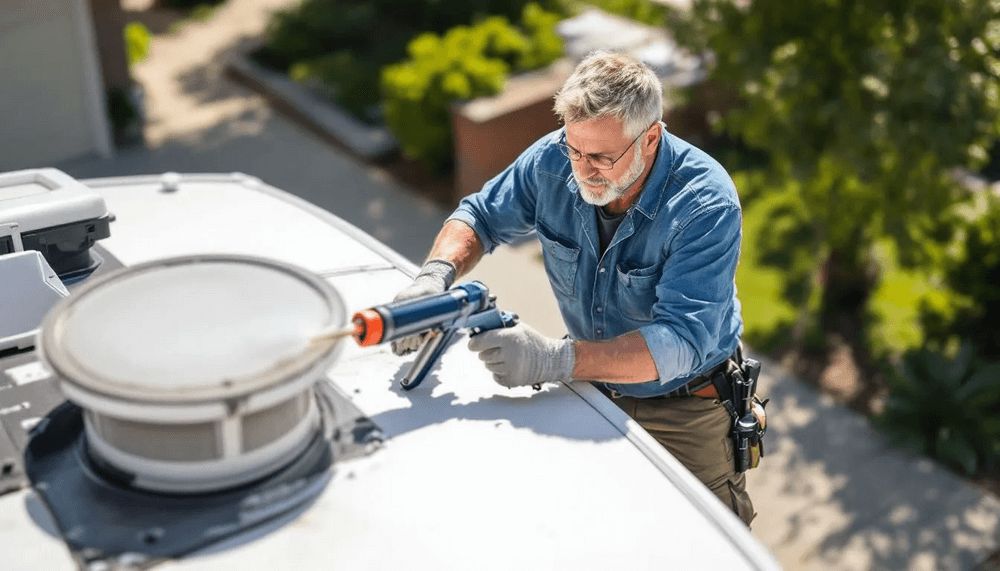
How to Apply RV Roof Sealant
The method for applying sealants to fix an RV roof leak will depend on the product being used and the type of damage being repaired. However, the process for prepping your work area and applying these products is mostly the same.
Step #1 - Gather Your Tools
Before starting any repair job, it's essential to gather all the necessary tools and products to complete the task. For RV roof repairs, you'll generally need:
- Ladder
- Work gloves
- Plastic scraper
- Utility knife
- Sealant products (lap and cap sealants, RV tape, coating, etc)
- Caulking gun
- Paint roller
- RV-safe cleaner, mineral spirits, or rubbing alcohol
- Clean, dry rags
Step #2 - Surface Prep
The first step is to remove old caulk, sealant, or tape and clean your work surface thoroughly. Use a plastic scraper to remove worn-out sealants and then clean the area with rubbing alcohol or mineral spirits to loosen and remove any residue.
Then, you'll want to give the surface some time to dry thoroughly before getting started.
Step #3 - Applying Sealants
Next, apply your sealant products to the repair areas. If using a lap or cap sealant, you'll need a caulking gun to apply a generous bead of sealant to any gaps, cracks, or voids that need to be filled.
Refer yourself to our guide on how to fix RV roof leaks for more tips and tricks on sealant application.

Step #4 - Proper Curing Time
Different products require different curing times. Generally, 24 to 48 hours provide enough time for your sealants to dry and cure properly. Still, we recommend checking the manufacturer's directions for the specific time required for proper curing.
In the meantime, avoid touching, walking on, or disturbing your sealant repair job.
Step #5 - Inspect And Protect Your Repair
Finally, once cured, it's time to inspect your repair job to make sure you didn't miss any spots.
If you want to be certain your repair will last, we recommend adding a layer of RV repair tape over any seams or surfaces you've repaired. This ensures your sealants aren't exposed to direct sunlight, rain, or weather, which can cause them to dry out prematurely.
Consider applying a coat of liquid membrane to provide full-roof protection throughout the season.
When Should You Apply or Reseal Your RV Roof?
You should reseal your roof annually or as needed if you notice leaks or signs that gaps are starting to open up.
We strongly recommend inspecting your roof for potential leaks, gaps, and cracks at least once or twice a season. It's better to catch those gaps sooner rather than later and quickly fill them with a bit of sealant. The other option is to have them go unnoticed, which only leads to bigger problems, like soft spots and water damage, later on down the road.
You can also check out our ultimate RV roof repair manual for more tips, tricks, and best practices for taking care of your RV roof.
The 5 Most Common Mistakes When Using RV Roof Sealant
Applying sealants or coatings isn't rocket science. But there are a handful of rookie mistakes you'll want to avoid. Let's take a look!
- Not cleaning the surface - Your roof's surface must be clean and dry for sealants to adhere correctly. You must remove any dirt, dust, or debris that may be present and clean the area with rubbing alcohol or mineral spirits.
- Applying in bad weather - Unless it's an emergency, it's best to apply sealant in sunny, dry weather. Rain or snow can prevent your sealants from properly adhering to your roof seams or edges.
- Using incompatible materials - You should only use products that are designed for RV use. Any sealants you use on the exterior of your RV must be designed to withstand harsh UV rays, water, and wind exposure. Additionally, you need to use sealants that are compatible with the type of roof your RV has.
- Over-applying or under-applying - It's like Goldilocks and her porridge... You don't want to apply too much or too little sealant. Applying too little may result in an inadequate repair, and applying too much can lead to a big, ugly mess, requiring you to start over.
- Not checking adhesion after curing - Once you've given your repair a couple of days to cure, you need to get back up on your RV roof and double-check that it's watertight. Sometimes, sealants shrink when they cure, so if you didn't apply enough, you may need to whip out your tools for a few quick touch-ups before calling it a day.
Avoiding these 5 simple and easily avoidable mistakes ensures that you and your family will have a wonderful season, no matter where the highways take you!

Frequently Asked Questions - The Best RV Roof Sealants 2025
Here are a few frequently asked questions we receive from our readers about RV roof sealant products.
How long does RV roof sealant last?
RV roof sealants can last anywhere between a season or two to 5 years or longer. It really depends on the quality of the products you use, how those products are applied, and the type of exposure they incur over the years. You can also take extra steps to ensure lap and cap sealants last longer, such as covering them with sealant tapes and coating your roof at least once every couple of years.
Where can I buy RV roof sealant?
You can purchase RV roof sealants from local dealerships, hardware stores, or online retailers, such as Amazon. TitanPatch RV sealant tape can be bought through Amazon or directly from the Tool Troopers shop, where you can also browse for other top-rated RV accessories, such as RV tire covers and roof repair kits.
Can I use silicone on a rubber RV roof?
No, we don't recommend using silicone on rubber, TPO, or EPDM RV roofs. Silicone caulk doesn't adhere well to these materials. That's why it's better to use RV-specific lap sealants, cap sealants, or sealant tapes, which are designed to be sticky and seal all types of RV roofs, including those made of rubber, metal, and fiberglass.
How do I clean old sealant before reapplying?
Use a scraper to remove as much of the old sealant as possible. Then use mineral spirits or rubbing alcohol to help loosen and remove any residue. In some cases, you'll need to apply a primer to surfaces with old sealants, which ensures better adhesion and an overall tighter seal. Check out our guide on applying roof coating for more information on primers.
Is lap sealant the same as cap sealant?
No. These products are similar in that they're both waterproofing materials. But lap sealants are meant for filling gaps or cracks on horizontal roof seams, whereas cap sealants are explicitly designed to help you repair and seal your roof edges or caps. Cap sealants are also meant to be non-sag sealants, which means they won't drip or run when applied to vertical surfaces.